Stripe Payment with React and NodeJS
Stripe Payment with React as the frontend and NodeJS as the backend is easy to configure. Stripe provides detailed documentation on the integration. Fine all the possible payment integrations here.
Let’s dig into the steps, to understand the integration.
Step1. First, sign up with Stripe and set up an account name on the Stripe Dashboard.
Step2. Build the backend API in Nodejs
- Install the libraries to access the Stripe API from your application (Nodejs).
npm install --save stripe2. Install the express package to listen to the incoming POST requests.
npm install --save express3. Define the /create-checkout-session route in App.js to accept payment. Replace the server key with your own, in the below code.
const express = require('express');
const app = express();

//Replace the sk_test_XX.. with your own. For production, this key will be like sk_live_....
const stripe = require('stripe')('sk_test_51IXXXXXXXXXXXXXXXXXXXXXXXXXXXXXXXXXXXXXXXXXXXXXXX')

//Here you define the URL /create-checkout-session, that the react client application will call
app.post('/create-checkout-session', async (req, res) => {

    //Create the Stripe session object which is unique to each request.
    const session = await stripe.checkout.sessions.create({
        payment_method_types: ['card'],
        line_items: [
          {
            price_data: {
              currency: 'usd',
              product_data: {
                name: 'Flowers',
                images: ['https://middlewareworld.org/wp-content/uploads/2021/07/581fa2106910162c5f0ccedeb67e7d7a.jpg']
              },
              unit_amount: 2000
            },
            quantity: 1
          },
        ],
        mode: 'payment',
        success_url: `https://middlewareworld.org/` + 'success.html?productID=78624$$F@#$SDF7,
        cancel_url: `https://middlewareworld.org/` + 'cancel.html',
        customer_email: 'my_email@gmail.com'
      });

      //Return response json to client with the session ID
      res.json({
          id: session.id
        });

});

app.listen(4242, () => console.log(`Listening on port ${4242}!`));
Let’s look at the elements of session object in detail.
payment_method_types: [‘card’]
This is the medium used for payment. Here are all possible options. We are accepting ‘card’ payment in the above example.
currency: ‘usd’
See all possible options for currency here. We are using USD in the above example.
{
name: ‘Flowers’
images: [‘https://middlewareworld.org/wp-content/uploads/2021/
07/581fa2106910162c5f0ccedeb67e7d7a.jpg’]
}
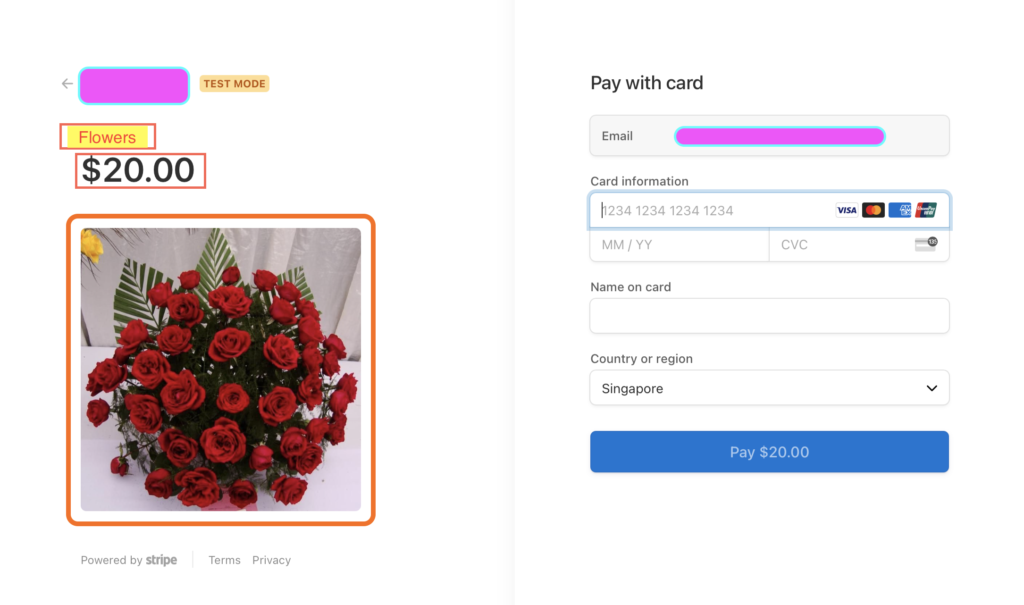
This is the name and image of the product to be shown in the Stripe Checkout Page as highlighted below.

unit_amount: 2000
The amount is in cents, hence the above value is equivalent to 20 USD. Note the same in the above checkout page.
quantity: 1
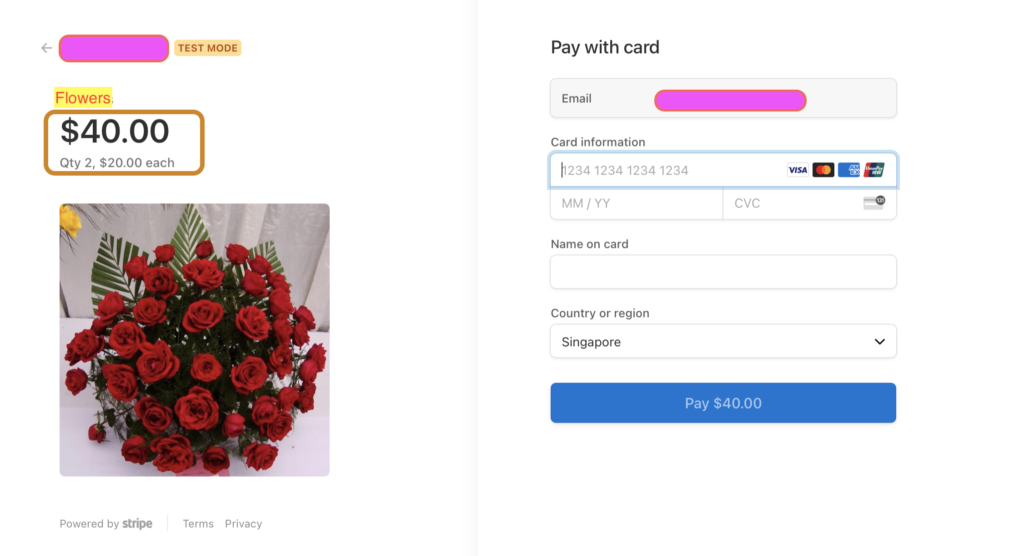
This denotes the quantity of the product, which is 1 in the above example. In case it is more than 1 (e.g. 2), the checkout page looks like below.

mode: ‘payment’
We are using the ‘payment’ mode. Here are all the possible options.
success_url: `https://middlewareworld.org/` + ‘success.html?productID=78624$$F@#$SDF7
After the payment or subscription creation is successful, Stripe directs the customer to this URL. Post that, Stripe calls a webhook, if configured in the Nodejs app, where you need to perform any required activities. after successful purchase. Updating Database after purchase can be a good example. You can add parameters to the success_url to pass information about the purchased item. In above example, we pass the product ID which is a common practice.
cancel_url: `https://middlewareworld.org/` + ‘cancel.html’
If customer cancels payment, Stripe directs the user to this URL.
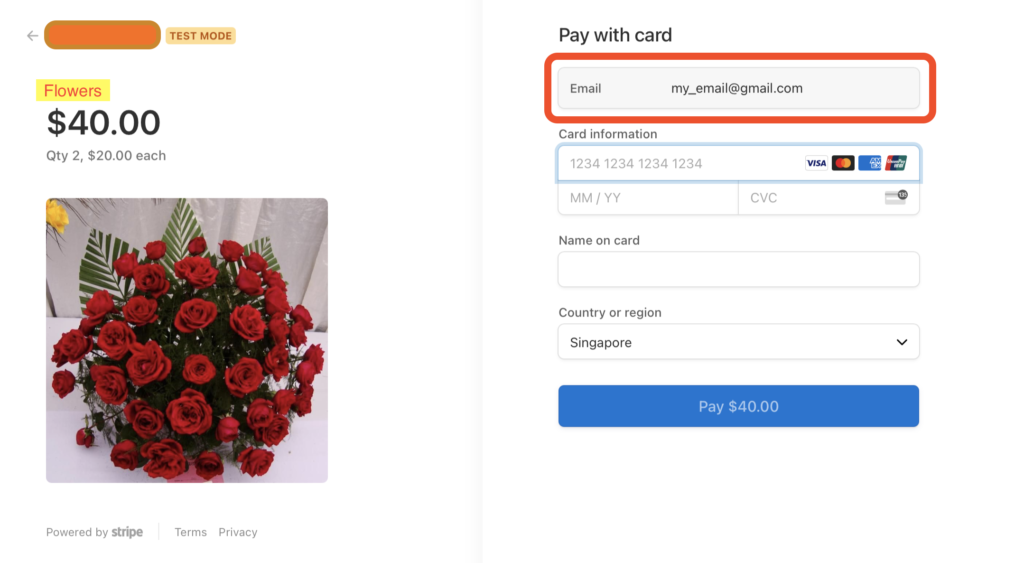
customer_email: ‘my_email@gmail.com’
Stripe populates this email automatically in the checkout page. Look at the below example.

      res.json({
          id: session.id
        });
Finally the session ID is returned to the client.
Step4. Now, let’s write the function in the react client, that invokes the payment, upon the click of a button.
import { loadStripe } from "@stripe/stripe-js";

   const handleClick = async (event) => {

        //This is the publishable key to use at the client side.
        const stripePromise = loadStripe('pk_test_XXXXXXXXXXXXXXXXXXXXXXXXXXXXXX');

        const stripe = await stripePromise;

        //Here, we call the Nodejs URL, configured earlier in this article. Replace the BASE_API_URL      with the actual Nodejs server URL.
        const response = await fetch(BASE_API_URL + "create-checkout-session", {
          method: "POST",
          headers: {
            'Content-Type': 'application/json'
          },
          body: JSON.stringify({
              //You can pass any parameters in the body, and use it in the Nodejs server to extract the value.
          })
        });


        //Client waits for the server to create and pass the session.
        const session = await response.json();

        //Use the same session ID returned from server to redirect client to the Stripe standard checkout page
        const result = await stripe.redirectToCheckout({
          sessionId: session.id
        });

        if (result.error) {
          // If `redirectToCheckout` fails due to a browser or network
          // error, display the localized error message to your customer
          // using `result.error.message`.
        }
    } else {
        //If control reaches here, that means payment is successful.
    }
  };
Step5. The last piece is to write the webhook in Nodejs server, where we perform some additional actions e.g updating database, after successful payment.
app.post('/webhook', bodyparser.raw({type: 'application/json'}), (request, response) => {
    //The webhook URL has to be the same, as Stripe invokes this path on the server after successful payment
    const payload = request.body;
    const sig = request.headers['stripe-signature'];

    // Handle the checkout.session.completed event. Note that there are many other events that you can check for.
    if (payload.type === 'checkout.session.completed') {
        //This is how you get hold of the success_url and its parameters from the payload
        const tmp = request.body.data.object.success_url
        const productID = tmp.split("?")[1].split("=")[1]

        //Get the customer email from the payload
        const customerEmail = payload.data.object.customer_email

        //Now you can use your productID and customer_email to perform the post purchase activities.
    }
}
Note that, other than ‘checkout.session.completed’, there are many more events. Here is the complete list.
We are done with the Stripe client and server setup with above steps.