Create EC2 instance in AWS and Connect via PUTTY
AWS is becoming the state of the art technology to host infrastructure of any startup or medium size companies, with a minimal cost, based on usage. It is as simple as having an account with AWS.
You need a credit card, though, to start using their services. The purpose is simple. As the saying goes – There is no free lunch. However, charging is totally based on usage, and there is a free usage quota, which can be used for small scale testing and deployment.
Without further adieu, let me explain in simple and easy steps, how you can provision a server, and attach it to a static IP/domain, and go live in the internet.
1. Login to AWS Management console with your account. If you don’t have an account already, create one here
2. Navigate to Services > EC2
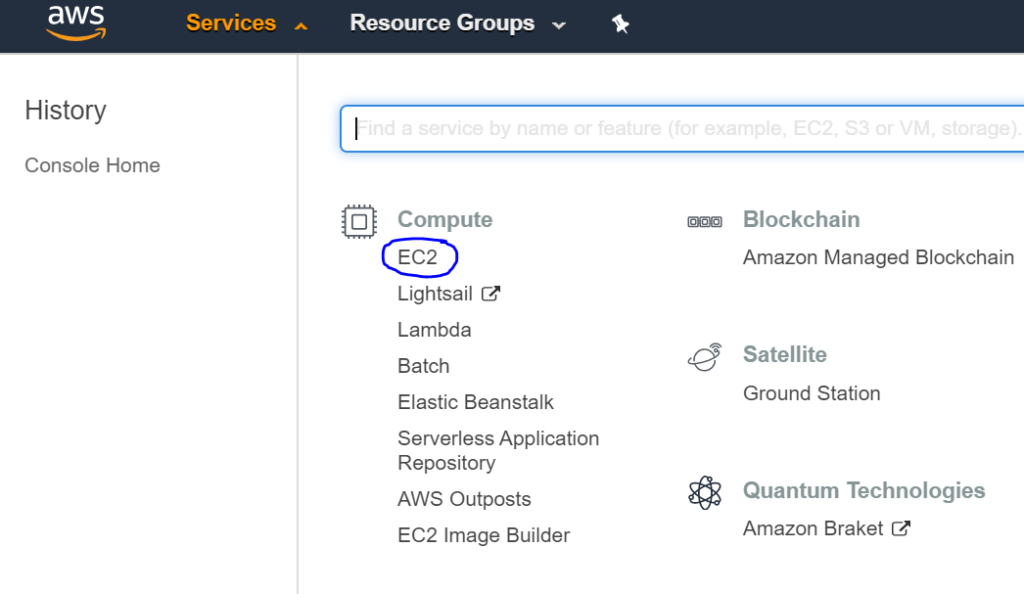
AWS Management Console
3. Under Instances, click on Instances
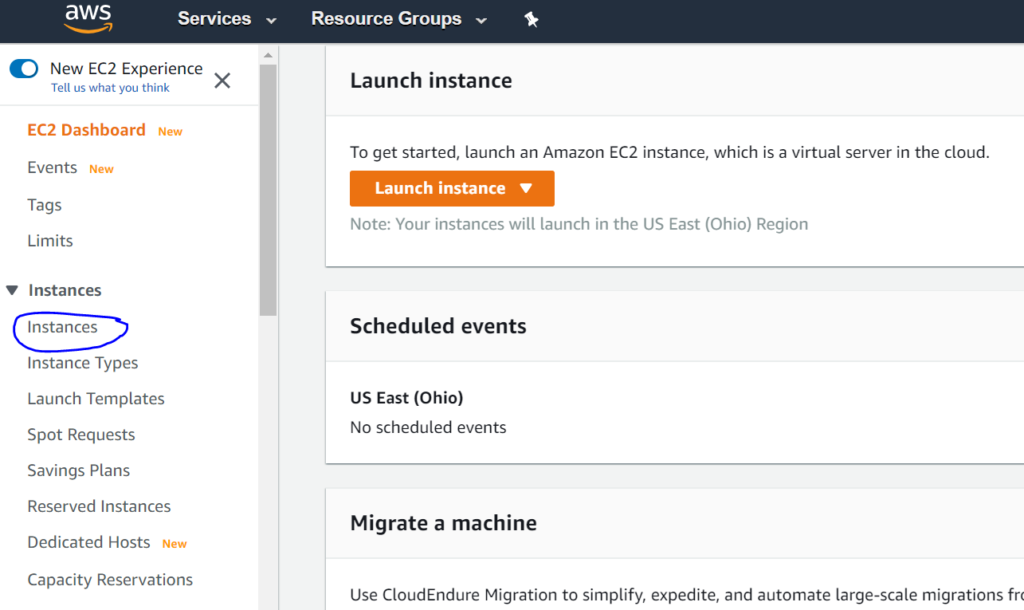
4. Click on Launch Instance on the right pane

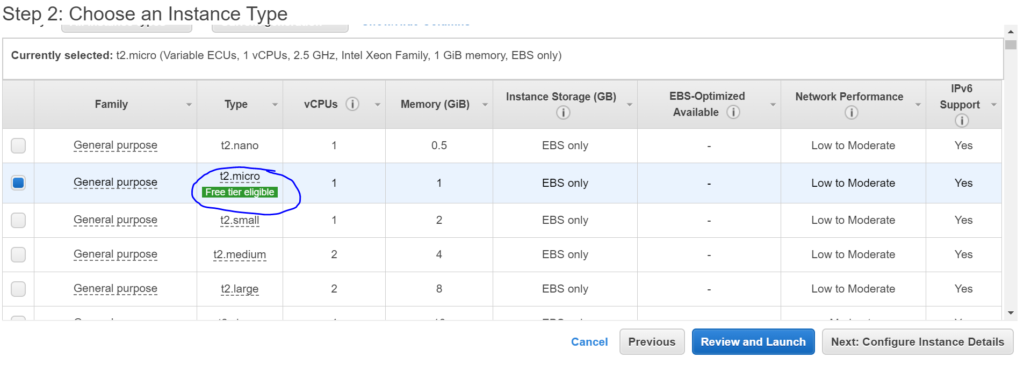
5. In the next screen, you get several Linux and Windows flavors to choose from. For this example, I will select the well known Redhat Linux. Be cognizant to select only those, marked as “Free tier eligible” to avoid increased billing.

6. Choose the free tier eligible option and click Next
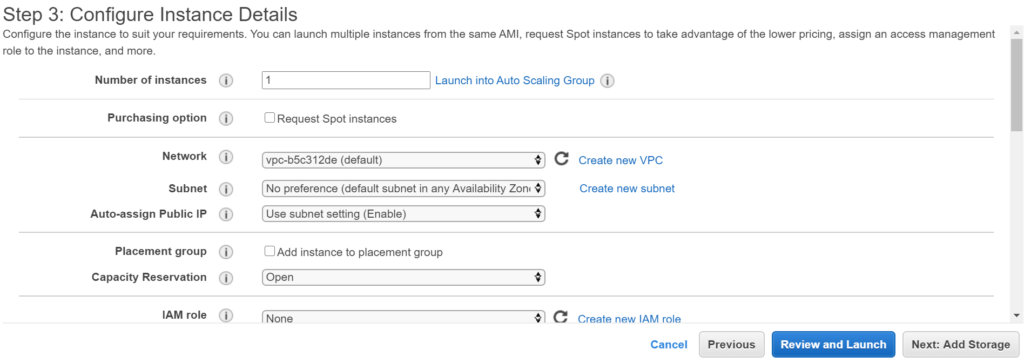
7. Retain all default options in the “Configure Instance Details” and click Next
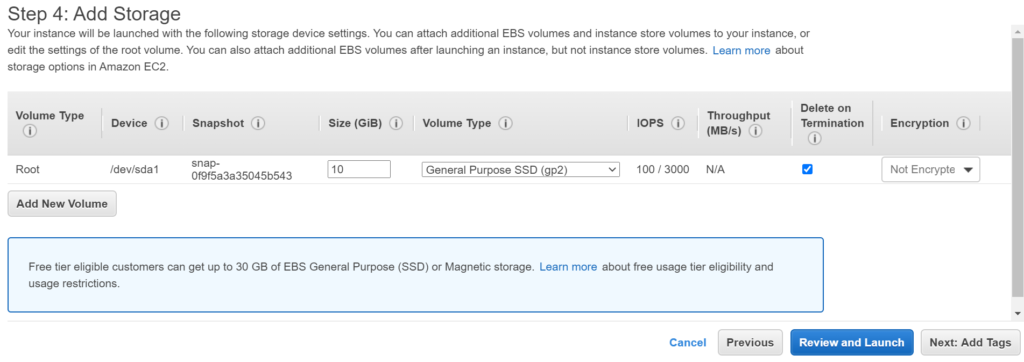
8. By default, you get 10 GB storage which is more that enough for medium level applications/testing, so retain the defaults and click Next
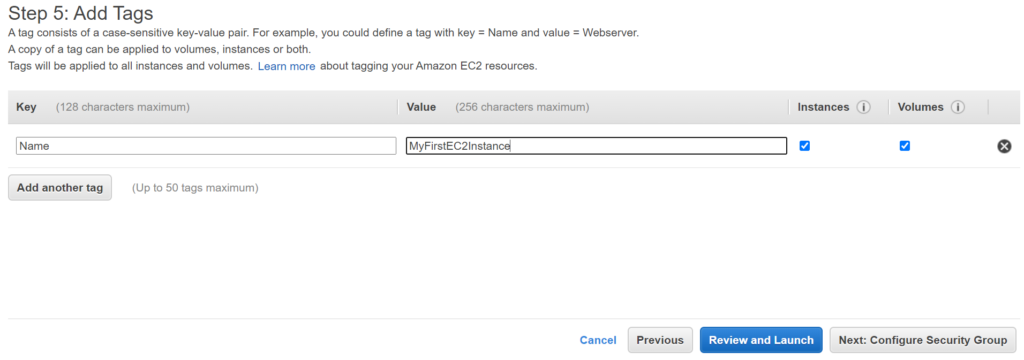
9. In the Add Tags section, you can specify a Name to identify this instance as below
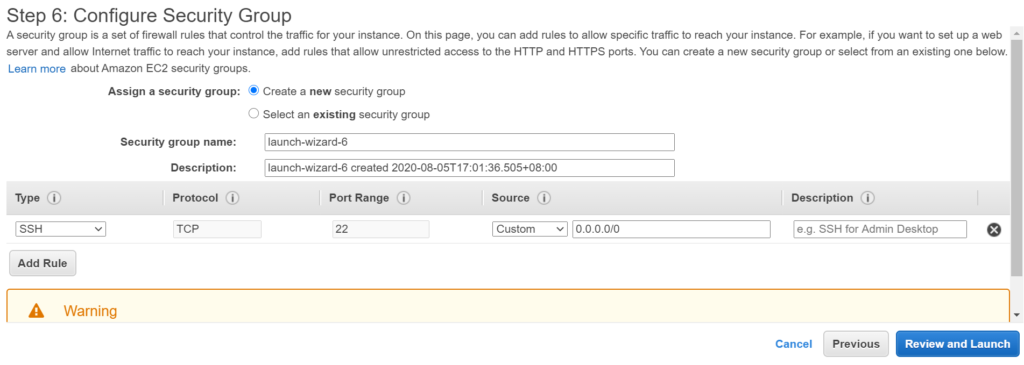
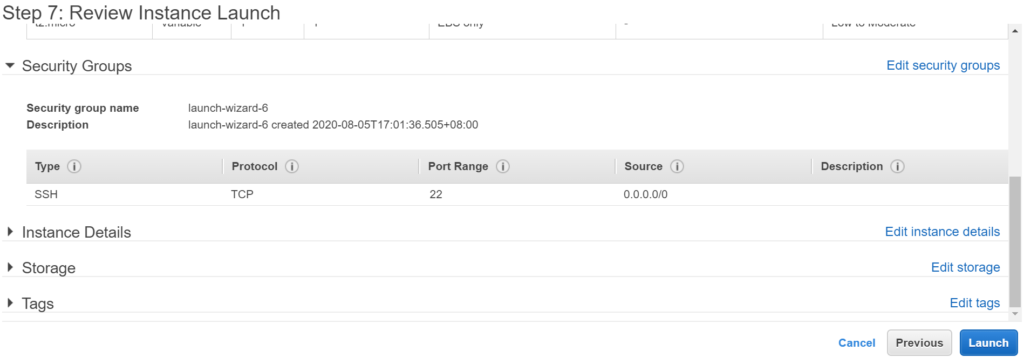
10. The Security Group is very important to understand and configure. By default, below group is created. 0.0.0.0/0 denotes any available IP in the internet. Be very careful while choosing the source. For security reasons, it is recommended to always allow your desktop IP or IP range from where SSH access is permitted.
In case you want to host an Apache, Tomcat web-server, in this EC2 instance, those ports e.g. 443/80, 8080, 3606 etc. needs to be allowed by the Security Group. For example, you can add below Rule to allow 443 port from the internet

You can use an EC2 instance to host any WordPress Website as well. Please follow this link to achieve the same. You can avoid a lot of dollars by hosting a website in AWS, which charges based on Usage, unlike other hosting companies which has fixed plans.
11. Click Launch to trigger EC2 Instance creation
12. In the next screen, you are asked to generate a key pair, or use an existing one. This step is very important, since the same key will be used to access the EC2 instance via SSH. Let’s select “Create a new key pair” and give it a name, then click “Download Key Pair”
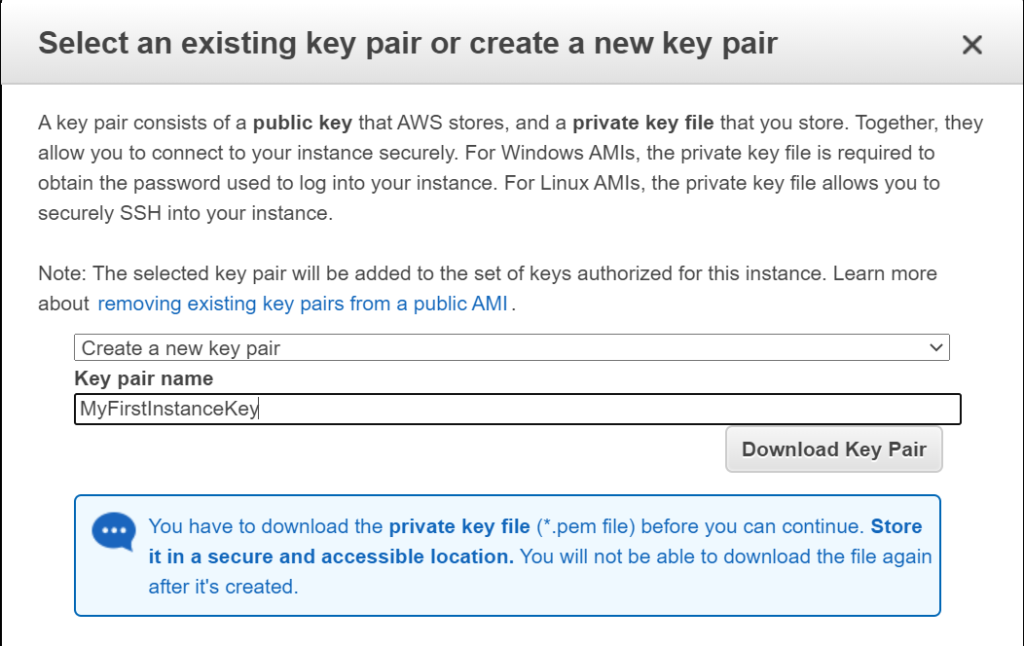
Note the dialogue box at bottom : You will not be able to download the file again after it’s created.
So, be cautious to keep the key pair in a safe and secure place and DON’T lost it. If lost, you will never be able to access the instance again.
13. Click Launch Instance
14. The instance can be accessed from the next screen by clicking on the Instance ID

15. In a matter of few minutes, the instance goes to the running State

You have built your first EC2 instance.
How to access the instance using putty?
1. Click on Connect to view the login method

2. Now you know exactly what needs to be done, and how to connect. However, I will explain further in details

3. MobaXTerm can be used to connect to the instance very easily, however, let me explain the detailed steps for connecting using PUTTY, which is the most common way
Steps for connecting using PUTTY

4. Navigate to Conversions > Import Key

5. You see the below screen after selecting the .pem file. Then, save the private Key by clicking “Save private key”. This will save the key in the .ppk format, which is accepted by PUTTY.

6. Choose Yes in the below dialogue

7. Now that you have the .ppk file, you can open PUTTY
8. Grab the Public IP allocated to the EC2 instance

9. Specify the same IP in Putty. Port should be 22 and Connection Type “SSH”

10. Specify the Private Key path under SSH > Auth

11. Now, when asked for username, type ec2-user as shown below. Note that ec2-user is the default user for RHEL. It may be different for other Linux flavors. For example, it is “ubuntu” for Ubuntu instance.

12. That’s it. You are done. Once inside the instance, we can use “sudo su – ” to switch to root.


Hope you are able to follow the above steps, and create your EC2 instance using a free account in AWS. Please provide your comments, or reach out to me via the Contact Form and I will surely reply within a few days.